
How to properly diagnose a malfunction in an illuminated decoration?
I think the illuminated decoration has gone out...


Your illuminated decoration no longer lights up, or only part of it works? This type of problem is common and can quickly become frustrating, especially as an event or the holiday season approaches. You're wondering where to start to find the fault and fix it without dismantling everything.
In this article, you will discover the essential steps to diagnose a defective decoration: inspecting connectors, checking fuses, testing transformers, and much more to restore a fully functional decoration safely.
My decoration does not light up at all
Various reasons can cause an illuminated decoration not to light up. You must proceed by following each of the following steps in order if you want to solve the problem permanently:

Above, an example of a defective light string.
1.Unplug the decoration to avoid the risk of electric shock.
2.Carefully inspect your decoration to see if you can detect any signs of a short circuit. You may find black marks at the junction of a connector and a light string. If so, it means that water has infiltrated and caused a short circuit. In this situation, the connector that powers the light string and at least the blackened or extinguished section(s) of the string must be replaced.
3.Continue the inspection by carefully examining the junction box. Several decorations are equipped with junction boxes inside which the electrical connections are made to power different types of lighting equipment. Open the box and make sure that the connections are still in place. If this is not the case, be sure to redo it with the appropriate equipment. We favor the use of lever wire connectors rather than screw-on wire connectors (wire nuts) inside these junction boxes. They are more reliable and faster to install.

Example of an open junction box (above).
4.Check the condition of the fuses. Normally, all power cords for illuminated decorations or lighting equipment are protected from overvoltage by small cartridge fuses that are installed in the male electrical plug. They are either inserted under a small plastic screw located between the two prongs of the plug or inserted behind a small guillotine door located at the base of the electrical plug. In the latter case, there are 2 cartridge fuses: one that protects the circuit and a replacement fuse. The 2 fuses are side by side behind the small door. If the fuse is blackened or the filament inside appears broken, it means there has been a short circuit. WARNING, if you only replace the fuse, the problem will not be solved! You have to find the source of the short circuit and make the appropriate repair, otherwise the fuse will blow again.

Two cartridge fuses integrated into the male plug are visible above.
5.Now check the condition of the rectifier or transformer. Decorations using 120V equipment are generally equipped with a device that transforms alternating current into direct current, called a rectifier (small black box or a kind of bubble on a white or black cable). In the case of decorations using 24V equipment, this equipment is powered by a transformer that produces 24V direct current from 120V alternating current. It may happen that, for some reason, one of these power supply devices may be defective. To check its operating condition, the simplest method is to temporarily replace the device (rectifier or transformer) with the same device from another decoration of the same type. If the decoration lights up, then it is the rectifier or transformer that needs to be replaced. If it still does not work, the investigation must continue.

Two examples of rectifiers: black box (top), bubble on cable (bottom)
6. Finally, check the condition of the electrical outlet and the surge protector (GFI). A malfunction in an electrical device can cause a circuit breaker to trip in the electrical distribution panel or the circuit breaker that protects the GFI electrical outlet. Check the condition of the circuit breakers and reset them as needed, ensuring that the illuminated decoration is disconnected from the electrical circuit. Electrical outlets with surge protectors are usually sensitive to humidity, so you may need to reset the circuit breakers regularly.

Always ensure that the electrical outlet and surge protector (GFI) are in good condition.
7. Reconnect the illuminated decoration to the electrical power source. At this stage, you should normally have identified the malfunction(s) in your decoration. Once the repairs have been made, you can now reconnect your decoration and validate its proper functioning. If it still does not work properly, repeat the inspection step by step or contact your supplier for professional support.
The LED brightness of the decoration is very low
If your decoration lights up but the brightness is very low, two options are possible:
The decoration is assembled with 230V material and powered at 120V. If the material appears to be in good condition and has not been worn or burned by exposure to the sun's UV rays, this is probably the source of the problem. As some streetlights only provide 240V current, there are decorations on the market made with 230V (240V) lighting material that will not offer their full performance when powered by a lower electrical voltage. However, in recent years, there has been an increasing amount of lighting material powered by 24V transformers. These transformers, in turn, can easily be powered by 120V or 240V. This would therefore not be the reason if it concerns 24V decorations.
The lighting material has reached the end of its useful life. Obviously, all illuminated decorations must be relamped after a certain number of years. The useful life of the lighting material on a decoration can vary from 5 to 10 years depending on their period of use. The aluminum structure, on the other hand, has a life expectancy of more than 25 years, considering that it will not corrode and will not deteriorate, or very little, over time. If the material appears to be worn or burned by exposure to the sun's UV rays, it is probably time to consider relamping your decorations. You can do the work yourself and ask your supplier for an estimate of the quantities of material required, or ask for an estimate for a complete relamping including labor and materials.
Part of the lighting material on my decorations does not work
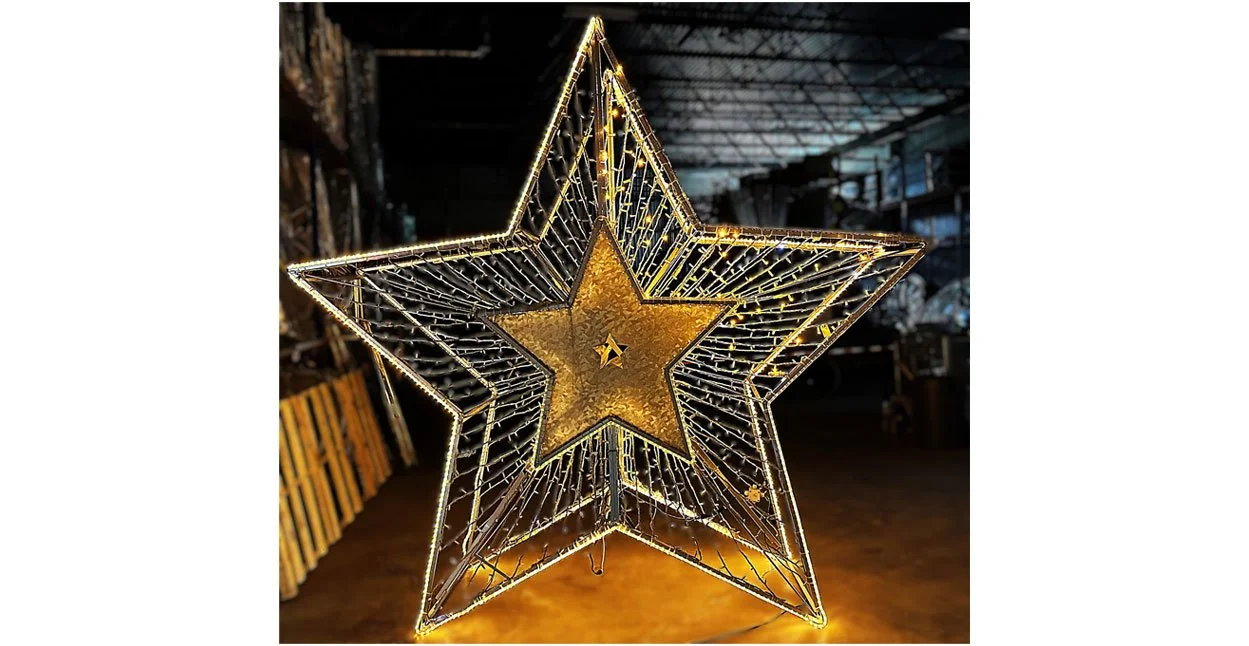
Above: the Enchanted Star decoration with sections of extinguished string lights, which will be replaced by our team of experts.
If some segments of lighting material do not light up on a decoration, it is quick and easy to replace them since, apart from the rope light, all types of material use screw connectors. Simply operate as follows, depending on the type of material:
1. To change a defective string light: The LED string lights, whether fixed or twinkling, can be disconnected in sections of 5 to 10 meters (generally 5M for Leblanc products). Simply identify the defective section, cut all the nylon ties (Ty-Rap) with appropriate cutting pliers, unscrew the connection connectors, connect the new string light and attach it to the aluminum frame with new nylon ties. However, before attaching an LED string light, it is essential to untwist the string light cable so that it can be properly tensioned between each attachment point, otherwise the string light will not be long enough and/or will remain loose. To do this, simply attach a section of string light to a fixed point, to a beam for example, and stretch the electrical cable by untwisting it (but not completely) enough so that the cable can be tensioned without slackening.
2. To change one or more sections of defective rope light: Before considering repairing a partially defective rope light, it is important to know that these rope lights can be cut at the cutting marks, the length of which may vary depending on the voltage and color of the ropes. Here is a small table that indicates this information for Leblanc Illuminations material:
| Cool white | Warm white | Blue | Green | Pink | Red | Yellow | |
|---|---|---|---|---|---|---|---|
| 120V | 91cm (36") | 91cm (36") | 91cm (36") | 91cm (36") | 91cm (36") | 1.5m (60") | 1.5m (60") |
| 24V | 16.7cm (6") | 16.7cm (6") | 16.7cm (6") | 16.7cm (6") | 16.7cm (6") | 33cm (13") | 33cm (13") |
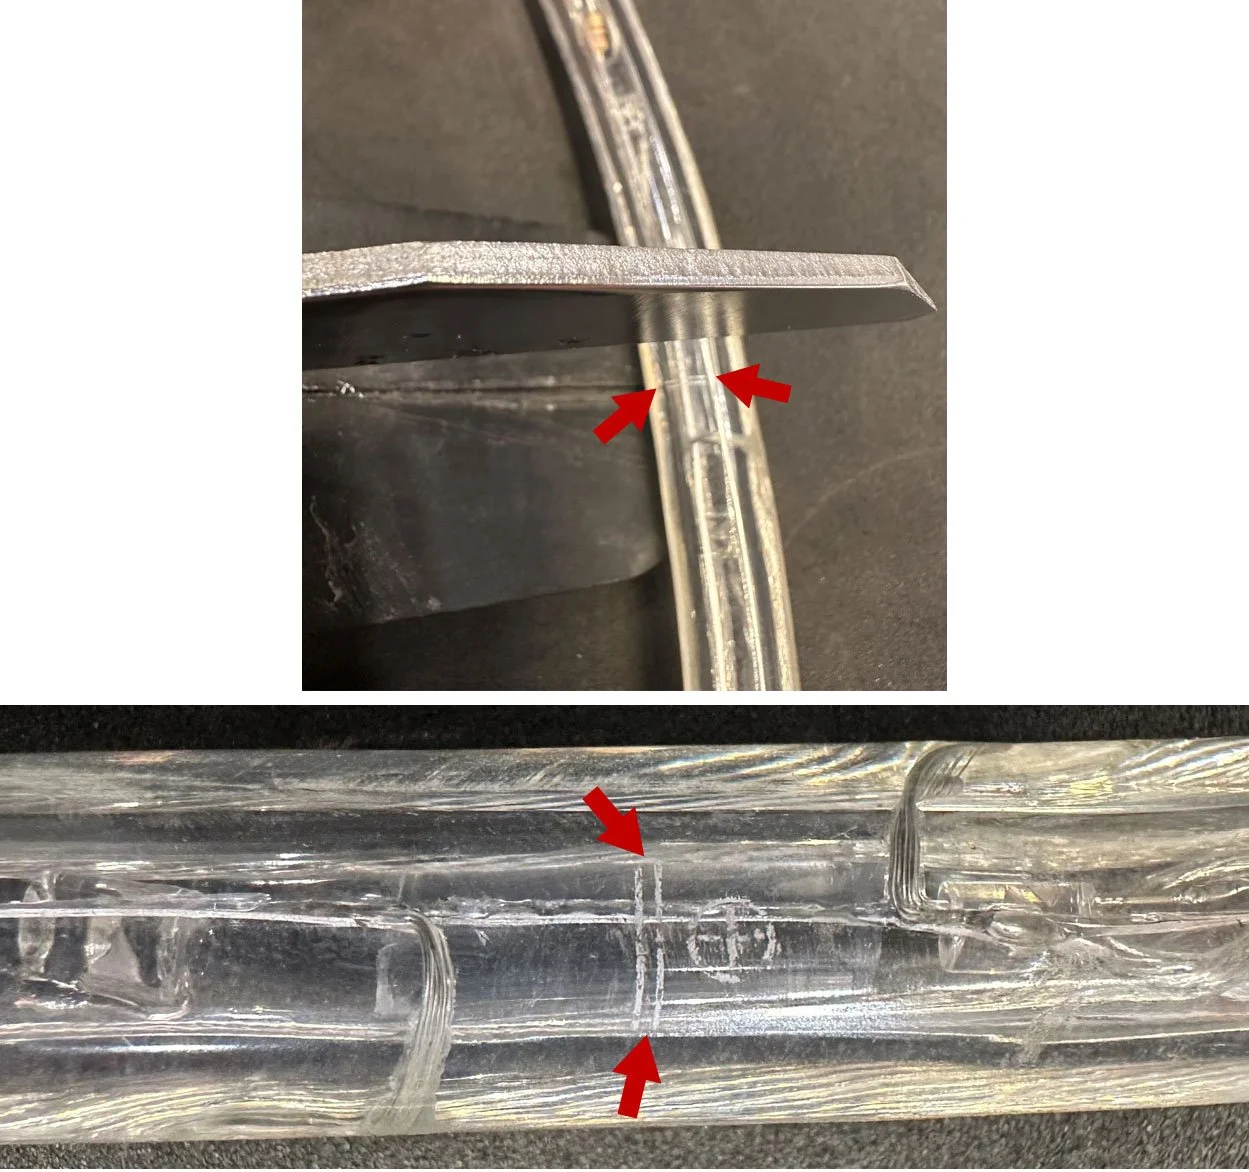
The two small lines indicate where to cut the rope light.
Knowing this, it is now easy to predict the number of rope sections to use to carry out a repair. First, cut the rope light at the cutting lines closest to the defective section, and then cut the same length of new rope light. To join the rope segments, use two (2) rope connection kits (055193). First, insert a double-pointed connector into one of the rope segments, making sure that it is fully inserted in the correct direction, ensuring that the white plastic washer perfectly matches the round shape of the rope. Then slide the two small segments of heat-shrink tubing (1 of approximately 5cm and 1 other of 10cm). Now center the shortest segment of the sheath on the joint and heat the sheath with a heat gun so that it perfectly covers the joint. Then cover with the longest segment of sheath and heat the sheath again with a heat gun. To seal the joint, now attach nylon ties to each end of the longer sheath. If the defective segment is located at the end of the rope light, seal everything with a cap into which you will insert a few drops of silicone before inserting the end of the rope light. Then slide a segment of heat-shrink tubing, leaving it protruding by approximately 1.5cm, heat the sheath with a heat gun and you're done. If you need to connect the other end of the new rope to a rope already in place, repeat the sequence from the beginning, making sure to insert the sheath before joining the two ends of the rope.
3. To replace a defective chasing light string, droplight, or Stelly star: Some decorations feature animated lighting decorations such as chasing light strings, droplights (animated luminous icicles), or Stelly stars. To replace them, simply cut all the nylon ties (Ty-Rap) with appropriate cutting pliers, unscrew the connection connectors, connect the new decoration, and secure it with new nylon ties.
Conclusion
You now have all the keys in hand to diagnose and repair a defective illuminated decoration. Whether it's a blown fuse, a damaged connector, or a section of cord to replace, each step is within your reach with a bit of method and the right tools.
Remember: a decoration that does not light up or lights up poorly can ruin the visual impact of an installation. By following this guide, you reduce downtime and limit unnecessary expenses by replacing only the necessary elements.
If you are short on time or would like a professional inspection, our team can assist you, whether for a complete re-lamping or a simple targeted repair. You can also request a free assessment of the condition of your decorations.
At LeBlanc Illumination Canada, we support our clients in the management, maintenance, and optimization of their decorations season after season so that they always shine at the right time.